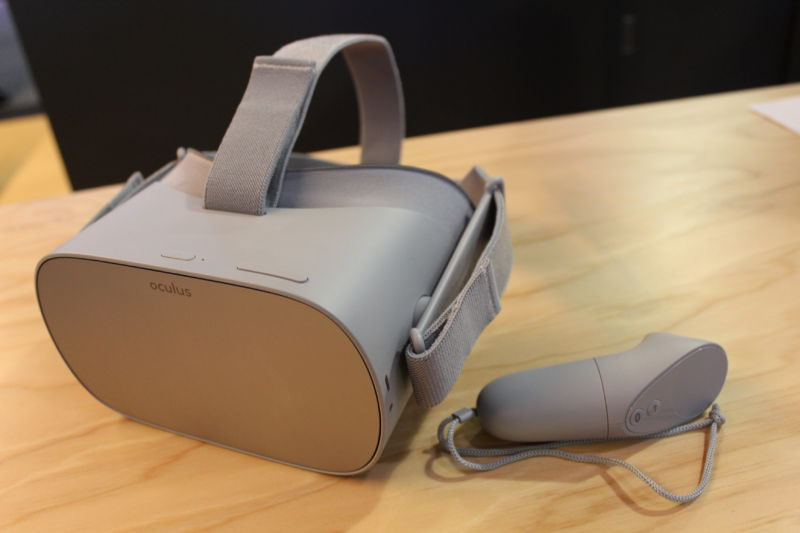
If you’re looking for a place to learn how to stream your Oculus Go, look no further. In this guide, we will show you how to use the casting feature on your Oculus Go and Oculus App, and how to use that technology as a pathway for streaming onto your PC. This (if you would like, although we do not recommend) could be used to stream onto Twitch, Youtube, or any streaming platform you would like to use.
The Oculus Go is a standalone, all-in-one headset that is mainly meant for media consumption inside of virtual reality. Although there are some games on the Oculus Store for the Go, most of them aren’t a full immersion experience that you would get out of the Rift, Vive, or even the Quest.
This will be a step-by-step guide that will teach you the ins and outs of streaming your Go. You can skip to the part that you need, although we recommend you reading the guide in its entirety, as you will become well educated for this matter.
How To Stream On Your Phone
The most basic way to get the video and audio of what you are doing inside of your headset to another device is the built-in Casting feature that Oculus has included with this headset. Accessing this is very simple, and enabling the stream onto your phone may be even easier. The following steps are exact and precise. Be sure to follow them closely.
- Open your Oculus App with the device that is paired to your Oculus Go. (If you are wanting to stream to a different device, or got a new device since the setup process, you will have to factory reset your headset and re-login on both devices)
- Turn your Oculus Go on.
- Turn your phone bluetooth on, and pair the headset with the phone by pressing the Oculus button inside of the app.
- Ensure that your your device and your headset are on the same WiFi network. The faster the better.
- Place your Go on your head and return to the home screen if necessary
- On the Oculus home page, select Sharing.
- Select cast, it will be located on your left hand side.
- Tilt the headset up, and confirm on your device that you would like to start streaming.
- Enjoy your streaming!
The quality of this stream will be good, not great. Of course it won’t be a high-res output, as that is something the headset itself won’t put out. While the casting is in motion, you will be able to tell a slight difference in the performance of your Go. This won’t be drastic, but the user will be able to feel and see a small problem with latency and lag, inside the headset and with streaming.
This function is great for guiding new users inside of virtual reality, watch other peoples games or experiences, and even for watching a show in multiple places at once. You will be able to screen record during the casting if that is something you’re planning to do.
How To Stream Onto Your PC
There is no way to get your Oculus Go to your PC directly, although there are plenty of ways to get around it to ensure that the end output is on your PC. For that, there is going to be some software that you need to download on your PC or phone, or in some cases, both. This shouldn’t take too much storage on said devices.
Vysor: This is a simple software that you can download on your PC that is an easy way to use and work with ADB. It is free, and takes care of the command lines. This is an easy way to stream to the PC, although the audio isn’t picked up well.
ADB: This is the loved Android Debug Bridge. It is a fan favorite to stream your android device onto your PC. Its free, easy to install, and very functional. There are many plus sides to using this, although the downfall is the lack of audio. This streaming will not take audio with it.
MirrorOp: For this method, you will need to have the sending app installed on your device, and the receiving app installed on your PC. This shouldn’t be a problem. This does cost $10 for the full version, but the enhanced audio and video stream is well worth the money.
Chromecast/Miracast: With these options you are able to stream to a bigger HDMI display, perfect for large groups and parties. Through this you are unable to stream to a PC, unless it doubles as your HDMI display.
Once you have chosen your preferred method of PC streaming, you will be able to get started! To start, you will follow the same guide for streaming onto your phone but start streaming before you use your next app. This will ensure your stream is already going when you finally connect to your PC.
The streaming on the PC is not much worse than the streaming on the phone. There is obvious latency issues and performance issues, but adding the PC to the stream is not as bad as one would think.
If you’re looking for a faster connection to the PC, using a regular USB cable might be your answer. The streaming apps will work significantly faster when plugged into the PC, and this will make the experience inside the headset much more enjoyable, and the stream much more watchable.
Getting The Stream To Twitch
We suggest not adding in more work into your Go, as it is not nearly as powerful as any gaming headset. With that being said, if you’re looking to stream your Oculus Go game or experience onto Twitch, Facebook, or any other streaming platforms, we are here to help you fulfill your dreams.
You will first need to download a reliable OBS software on your PC. This can be done for free, as Streamlabs OBS is our preferred software. Be sure to have your Twitch account already made as it will save you some time inside of the setup process. Below we gave compiled a step by step to get your Oculus Go all the way to Switch!
- Before even opening your OBS, you will want to launch the Oculus game or experience that you are wishing to broadcast. This will save your stream some messiness.
- After your headset is up and running, you will need to launch you OBS software that you have installed.
- On the bottom left, you will find the sources section. Find that and click on the plus button
- A list will appear with options, click on game capture and confirm it by clicking OK.
- Go down to the Mode section and click on the dropdown menu.
- This will bring you to another list. Click on Capture Specific Window.
- Go to the Window section and click on the dropdown menu.
- Find the open window that has the headset streaming to it, and click on the desired window.
- Click OK, as it should confirm. That will bring the frame that has the headset into the OBS.
- On the bottom right of the page, click on the Settings.
- Go to the dropdown menu inside of the Service section.
- Click Twitch (or any available stream that you will use)
- Click on the Stream Key field
- Enter in your unique stream key that Twitch has provided for you (do not share this, or people can steal your stream)
- To the bottom right, click apply.
- Click OK to confirm.
- Click on Start Streaming
- Your stream should now be on Twitch with your Oculus Go! You can open another browser to confirm through Twitch.
We do not recommend this, as it can be very unreliable and not the best quality of stream for your viewers. After this is all setup, you can mess around inside of the OBS to get your stream to be the best version as possible. Although it is not intended to do so, you can get your Oculus Go on Twitch. Happy Streaming!


